First-time setup: Install Julia & Pluto
Step 1: Install Julia 1.13
We install Julia with juliaup, the official Julia installer and version manager.
Windows: open the Command Prompt and run
winget install --name Julia --id 9NJNWW8PVKMN -e -s msstore
macOS and Linux: open a Terminal and run
curl -fsSL https://install.julialang.org | sh
Accept the default options. Then close the terminal, open a new one, and make Julia 1.13 the version you use for this course:
juliaup add 1.13
juliaup default 1.13
If anything goes wrong, see the instructions at julialang.org/install.
Step 2: Run Julia
Type julia in a terminal and press ENTER. This starts the Julia REPL, the command-line interface to Julia. Make sure that you can execute 1 + 1:

Make sure that you are able to launch Julia and calculate 1+1 before proceeding!
Step 3: Install Pluto
Next we install Pluto, the notebook environment that we use during the course. Pluto is a Julia programming environment designed for interactivity and quick experiments.
In the REPL you type Julia commands, and when you press ENTER, it runs, and you see the result.
To install Pluto, we want to run a package manager command. To switch from Julia mode to Pkg mode, type ] (closing square bracket) at the julia> prompt:
julia> ]
(@v1.13) pkg>
The line turns blue and the prompt changes to pkg>, telling you that you are now in package manager mode. This mode allows you to do operations on packages (also called libraries).
To install Pluto, run the following (case sensitive) command to add (install) the package to your system by downloading it from the internet. You only need to do this once for each installation of Julia:
(@v1.13) pkg> add Pluto
This might take a couple of minutes, so you can go get yourself a cup of tea!

You can now close the terminal.
Step 4: Use a modern browser: Mozilla Firefox or Google Chrome
We need a modern browser to view Pluto notebooks with. Firefox and Chrome work best.
Second time: Running Pluto & opening a notebook
Repeat the following steps whenever you want to work on a notebook or an assignment.
Step 1: Start Pluto
Start the Julia REPL, like you did during the setup. In the REPL, type:
julia> using Pluto
julia> Pluto.run()

The terminal tells us to go to http://localhost:1234/ (or a similar URL). Let’s open Firefox or Chrome and type that into the address bar.

If nothing happens in the browser the first time, close Julia and try again. And please let us know!
Step 2a: Opening a notebook from the course website
This is the main menu - here you can create new notebooks, or open existing ones. The notebooks and assignments of this course are on this website. To open one of them, go to its page, and on the top right, click on the button that says “Edit or run this notebook”. From these instructions, copy the notebook link, and paste it into the blue box in the Pluto main menu. Press ENTER, and select OK in the confirmation box.
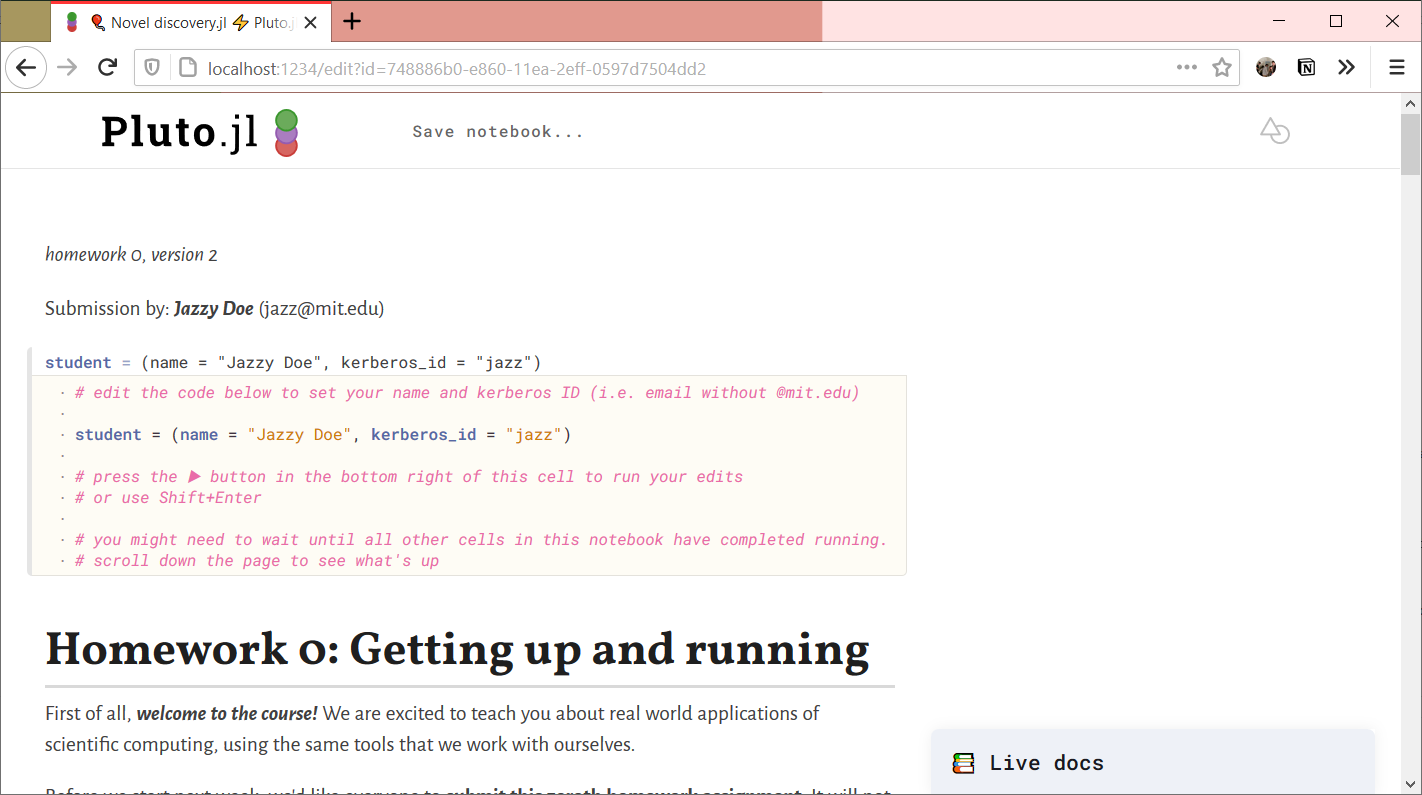
The first time you open a notebook, Pluto installs the packages it needs. This can take several minutes.
The first thing we will want to do is to save the notebook somewhere on our own computer; see below.
Step 2b: Opening an existing notebook file
When you launch Pluto for the second time, your recent notebooks will appear in the main menu. You can click on them to continue where you left off.
If you want to run a local notebook file that you have not opened before, then you need to enter its full path into the blue box in the main menu. More on finding full paths in step 3.
Step 3: Saving a notebook
We first need a folder to save our work in. Open your file explorer and create one.
Next, we need to know the absolute path of that folder. Here’s how you do that in Windows and macOS.
For example, you might have:
-
C:\Users\yourname\Documents\networks\on Windows -
/Users/yourname/Documents/networks/on macOS -
/home/yourname/Documents/networks/on Linux
Now that we know the absolute path, go back to your Pluto notebook, and at the top of the page, click on “Save notebook…”.

This is where you type the new path+filename for your notebook:

Click Choose.
Pluto saves your notebook automatically whenever you run a cell. You will find the notebook file (ending in .jl) in the folder you created.
Step 4: Submitting an assignment
You submit an assignment as an HTML export of your notebook on Moodle.
- Make sure that all cells have finished running and that your answers and figures are visible.
- Click the export button on the top right of the notebook and choose Static HTML. Your browser downloads an
.htmlfile. - Open the downloaded file in your browser and check that it shows your answers.
- Upload the
.htmlfile to the assignment on Moodle.